|
DAZ STUDIO TUTORIALS
Contact Webmaster:

|
|
|
Demo of Setting up Your DAZ Studio Program (D|S) Properties.
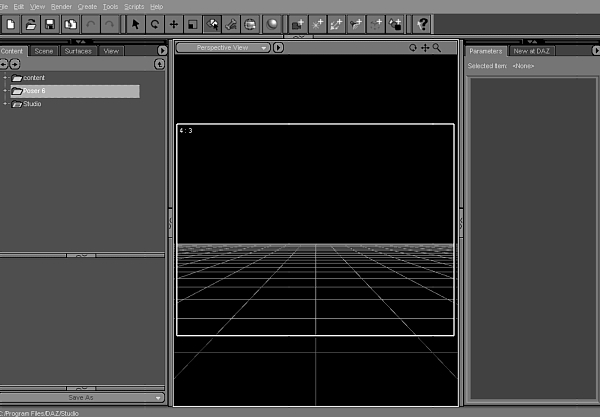
Here is what my D|S looks like when I open it. I will show you how to add tabs to make yours looks similar to this. The center window background color can be changed to any color by clicking onto the arrow next to "Perspective View" just at top right of you preview window.

You can see above that I have 4 tabs on left and two on right of my preview window. These tabs I use a lot, so I leave them there. The Content tab contains my content libraires from Daz and Poser.
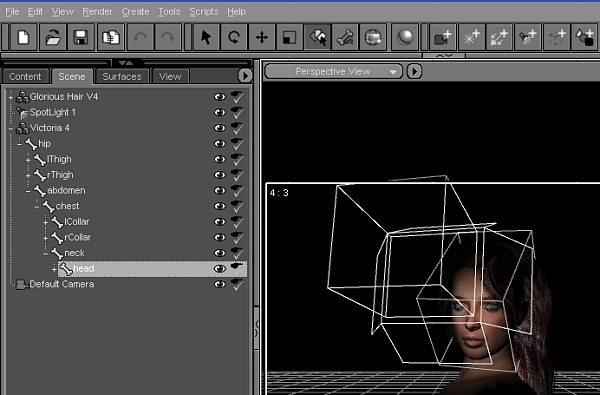
The Scene tab contains all the bones of each product loaded into the scene.

The Surfaces tab contains all the settings for surfaces, like colors and glossyness (in D|S, higher the number in glossyness means less glossyness).
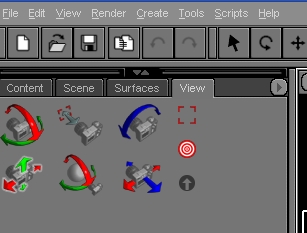
The View tab contains the cameras view which can be toggled closer, orbit, or side to side by dragging on the perspective icons in this tab.
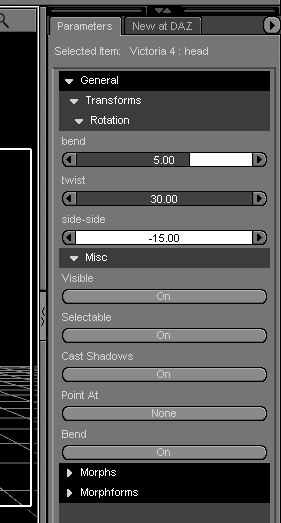
The Parameters tab, which I have placed on the right side of my daz preview window, shows positions and morphs of objects. You can move your objects to any position and change their shape in this tab window.
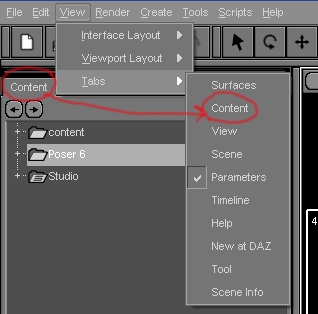
To open these tab windows in your D|S, click onto View>Tabs>Content...and for any other tabs you want to open a window. Put a check next to each tab you want. You can drag the window by the name on the tabs to position you want them to be in your D|S.
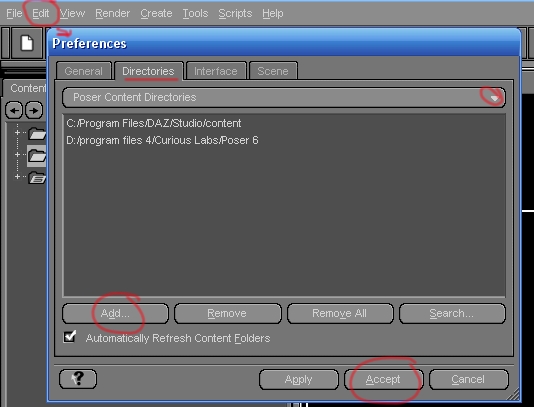
To get Poser contents into DAZ Studio, click onto Edit>Preferences and preferences window opens. Click on Directories>Poser content directories (this is at arrow circled on right and will drop down menu). Click on 'add' and browse to your Poser folder on your pc and click 'Accept', then 'Apply' and all your Poser content will appear in the content window as mine is above under Poser 6. You can put as many Poser files in here that you have on your pc, like P4, and P5. Daz content folder is listed in the DAZ directories in the drop down menu.
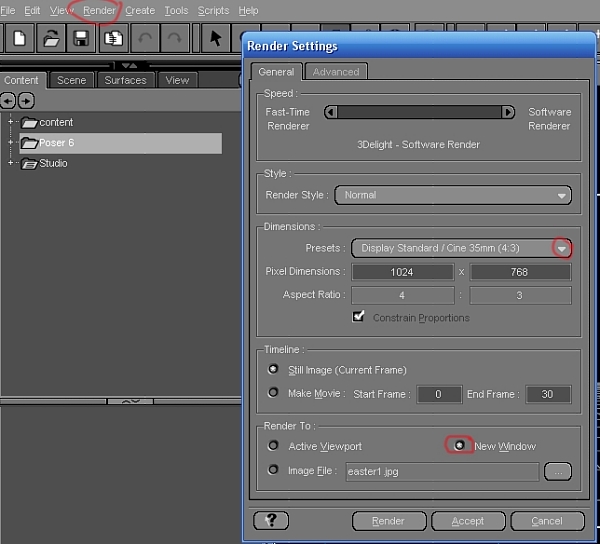
Before you render anything in D|S, you should select render settings, by clicking onto Render>Render Settings (circled at top left in above picture). In this window, drop down the menu in 'Presets' by clicking on arrow at right, (circled) and pick any size you want your renders to be in. I always render in 1024 x 768 because I make wallpapers for my web site that size. Also, put a dot in "New Window" box, so that you can watch you picture during rendering.

Your content is much easier to see in D|S than in Poser program, because all the folder thumbnail folders are gone. It's much easier to find your stuff. I also rearrange my stuff into folders. Advanced pc/poser/d|s users should only attempt this here.
Go to my DAZ site to see many more turtorials by others to operate D|S.
Go to my favorite products page and see other pictures and the products at DAZ that I have used in them.
A more detailed Turtorial is included in the Free Download. Please refer to that if you need more info about DAZ Studio. My goal here was to show you how easy it is to make nice wallpapers for yourself.
I have also made beautiful backgrounds with Bryce 5.5, found here. Many of my wallpapers are made with this program and DAZ Studio.
|
|